The Notifications tab allows you to send notifications informing users of deadlines, invalid submissions, and more. Two types of notifications are available: Standard and Automated. Standard notifications can be sent by any administrator, on the fly, to anyone in the system, for any purpose. (Note: Automated Notifications can only be managed by DOH administrators.)
When creating a new standard notification, you can select from any previously created templates; you can also create your own notification and/or template.
To Create a Standard Notification
-
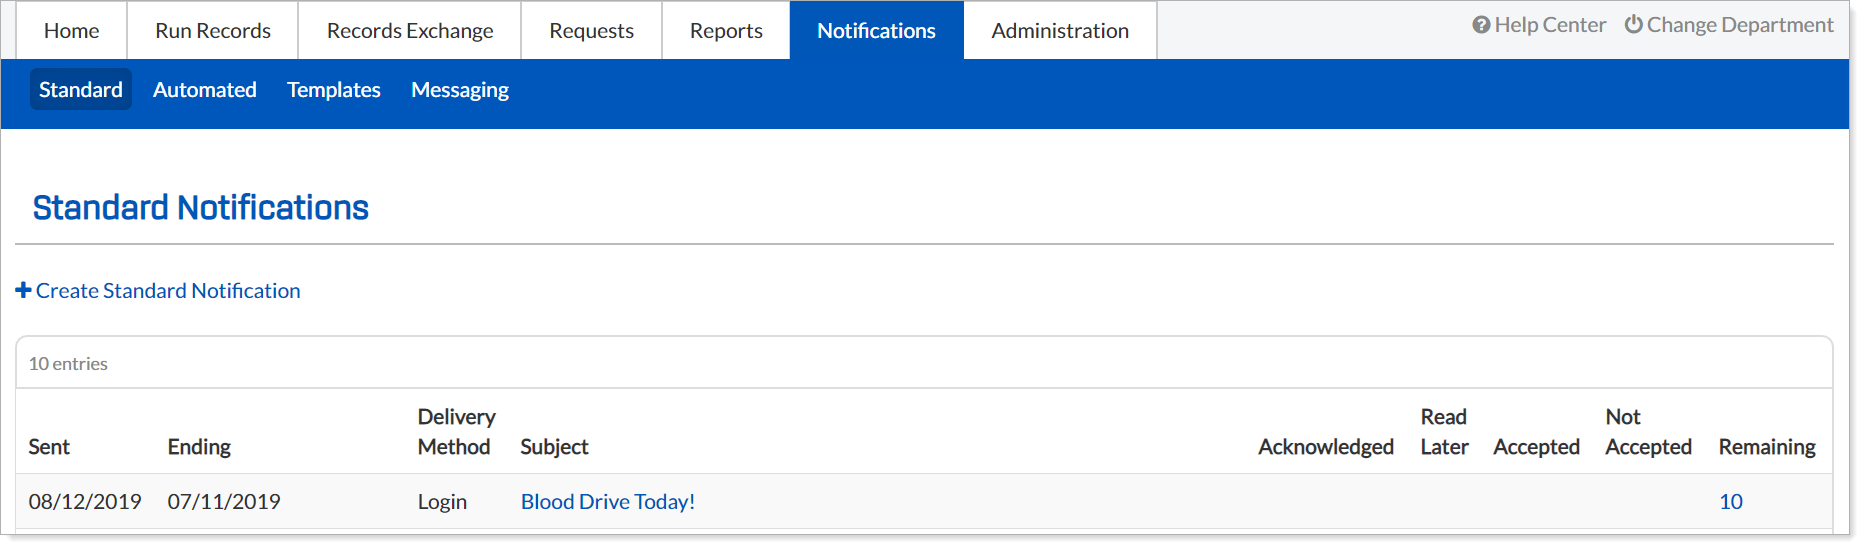
From any page, go to Notifications:Standard. The Standard Notifications page opens.
-
Click Create Standard Notification. The Create Standard Notifications page opens.
Tip: Required fields are marked with a red asterisk.
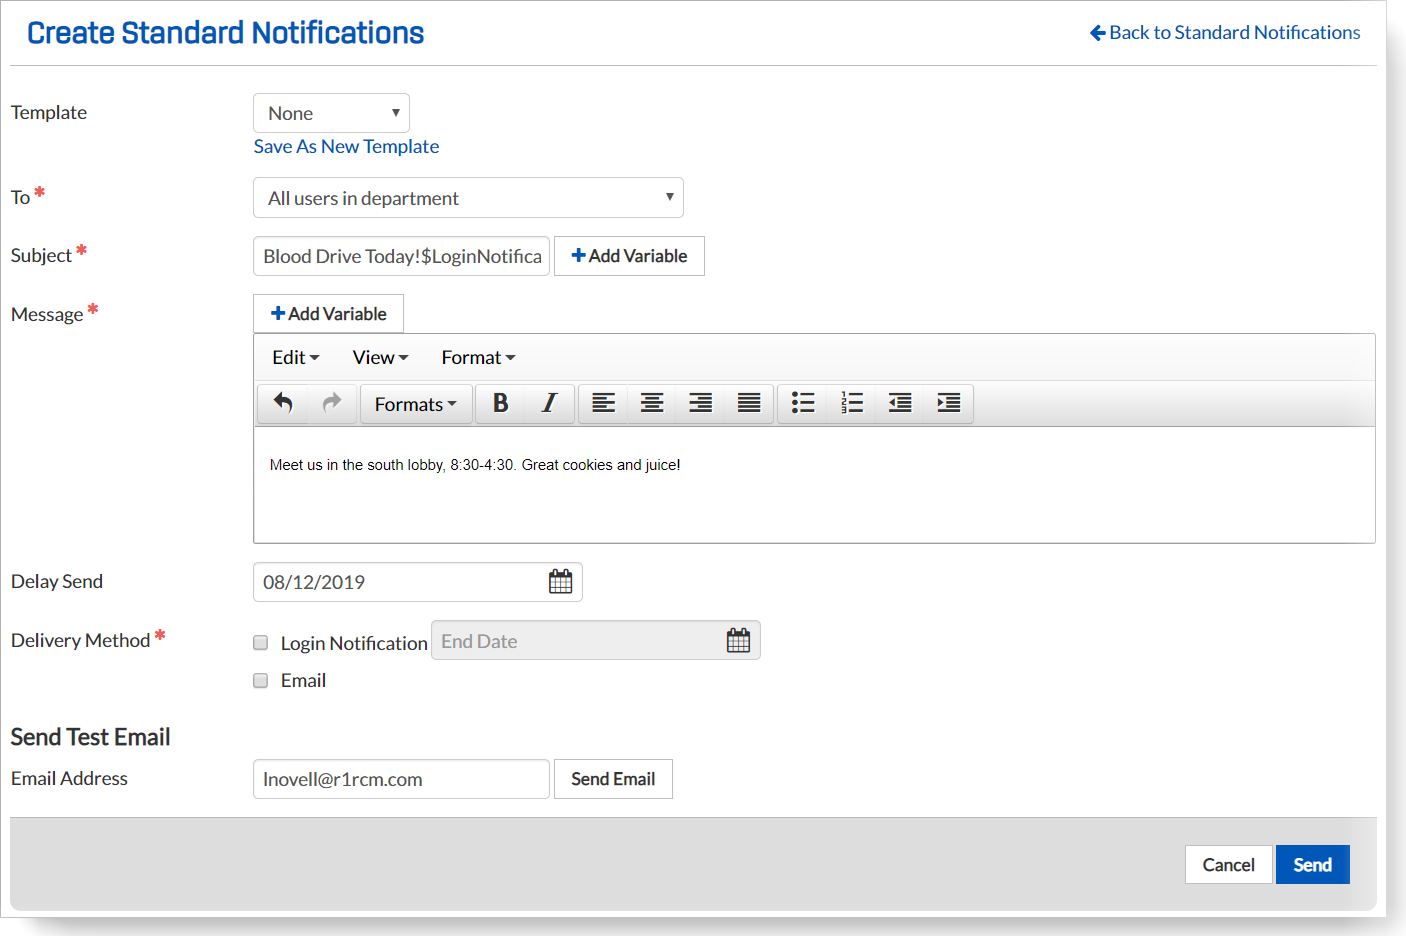
- Enter information in the fields. (See below for more information about the fields.)
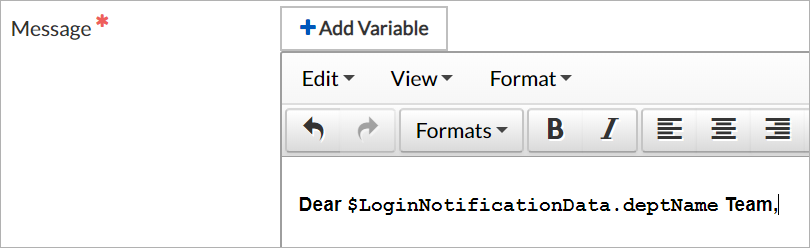
A Note on Variables
- If you click Add Variable at the top of the Message section, you can have the notification open with a personalized greeting. For example, if you typed "Dear [space]" then added the variable Department Name, then typed "[space] Team," the recipients' messages would open with "Dear My Department Team."
Send Test Email or Send Notification
- To see your message as it will appear to recipients, verify your email address in the Send Test Email section and click Send Email.
- When you are satisfied with your new standard notification, click Send.
Standard Notification Fields
Template—The template to be used for the standard notification
- This field defaults to None, but if you have saved templates, they will appear in the picklist associated with this field.
- Note: If you select a template, some fields may be automatically populated. If you want to save a new notification as a template, click the Save as New Template link.
- To—Who should receive the notification
- Recipient groups are created at Notifications:Messaging.
- Subject—Subject of the message
- Message—Message content
- Delay Send—To send the message at a later date
- Select a date—other than Today—for the message to be sent. If you specify a date, the message will be sent on the first processing hour of that day.
- Delivery Method—How you would like the system to deliver the message
- Login Notification—A notification window will appear immediately when a recipient logs in.
- End Date—The last day the notification will be delivered to users.
- (Note: If you do not select an End Date, the notification will continue to be sent to all users on login until you stop it by clicking the End Now link in the Standard Notifications table.)
- Email—The message will be to each recipient's email address
- Tracking—How recipients should respond to login notifications
- Selecting an option determines what the recipient sees when they receive the notification.
- Note: This field only appears if Login Notification was selected as a Delivery Method.
- Send Test Email—To send yourself a test email before sending the notification, verify your email address, and click Send Email.