Saving a run record allows the record to move along in the validation process, eventually becoming finalized and sent out for billing. Saving a record does not mean, however, that the run must be 100% complete. You can also save a run record that is in progress and return to complete it later, submitting it only after it is finished.
To Save a Run Record
By default, TripTix for Windows has several features to ensure that your data is saved frequently and securely. Regardless of custom configurations, TripTix for Windows automatically saves your run record every minute. The run record is also saved if you navigate to a new page.
In addition to the automatic saving features, you can always save a record manually by clicking Save in the upper-right corner of the run window. The entire ePCR is saved locally to your device. This is useful if you need to save your progress and continue documenting the run later. Note that clicking Save does not upload the ePCR to the data exchange platform.
If you have finished creating a run record and want to upload it to the clinical data exchange platform (CDX), click the Save link, and complete the following additional steps.
To Save and Upload a Completed Run Record
There are two methods for checking your run record for errors and completeness.
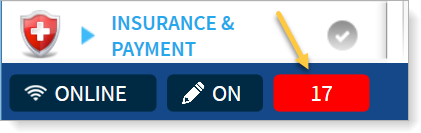
- At the bottom of every page of the run record is the red Requirement Indicator button. It displays the number of errors in the record, real-time. Tap it to review your errors.
-
Alternatively, tap Menu at the top of any page of the open run record.
-
Tap Error Check. The Error/Warning Remaining window opens, if applicable.

Note: Errors are marked with a red, circled star. Each has a brief description of required information that must be included in the report for it to be finalized. Warnings are marked with a yellow, circled x. Warnings, unlike errors, are simply recommended items; they are not required for the run record to be finalized.
If you do not address all errors, you cannot submit the record. Therefore, take one of the following actions, depending on whether you want to save any changes made to the run record:
To Exit the Run Record Without Saving
- Tap Exit Without Saving at the bottom of the Error/Warning Remaining window.
- A confirmation window opens. Select Yes or No as appropriate. Clicking Yes closes the run record and disregards any changes you made to the record.
To Save Changes and Exit the Run Record
- Tap Save & Exit. You may choose this option regardless of any remaining errors or warnings. You can edit the run later, at your convenience.
-
If you corrected all errors, tap Save & Finalize. This option queues the run record for upload and forwards it to the next appropriate queue (such as Supervisor Review.)
If your department has enabled the Auto-preview PDF before Finalization system setting, a PDF preview of the ePCR is shown for your review when you select Yes, Save & Finalize.
Tip: If you change your mind about exiting the record, close the View All Errors window with the x in the upper-right corner.