Note: This feature may not be enabled for your department. Contact your Client Services Manager for more information about adding the CAD Interface.
Computer Aided Dispatch (CAD) allows you to view a list of runs that a specified vehicle has made during the past 24 hours. You can then import data from a selected run.
To import CAD data in Windows
Important: Before activating CAD, designate a responding unit in the Responding Unit field in the Incident section of the desired run record or the User Settings page prior to logging in.
-
From within the open run record, tap the CAD link in the toolbar.
Note: You must tap the CAD toolbar link to retrieve new records each time you import CAD data. -
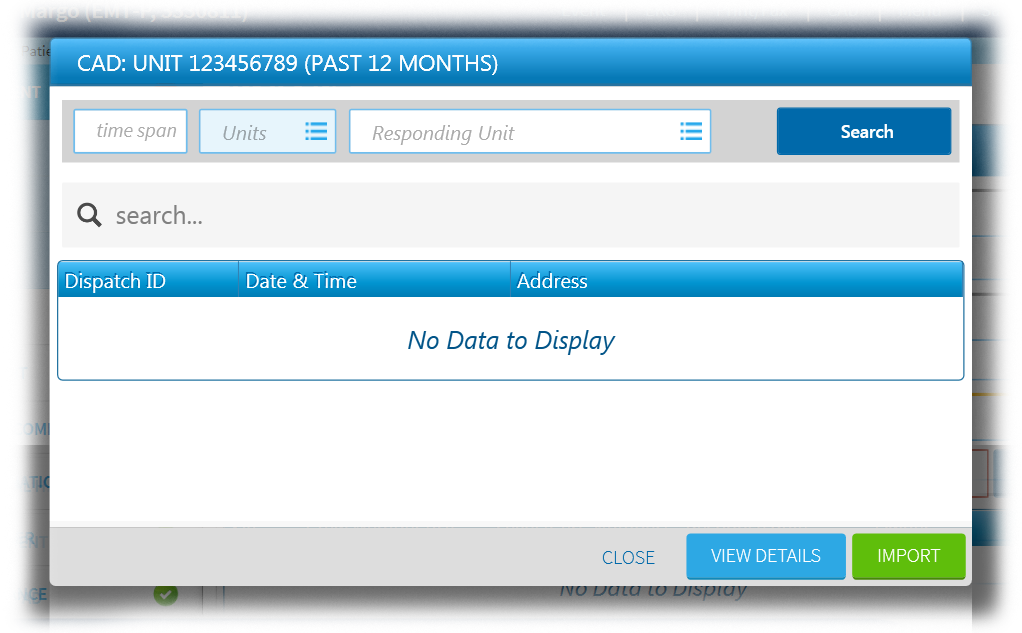
Select the desired run from the list and, to ensure it is the correct run, tap View Details.
-
If a run record is currently open, tap Import.
-
If CAD was activated prior to creating a new run, tap Create Run.
-
When importing CAD data into an open run, any information previously entered into the associated fields is overwritten and replaced.
-
The following fields may be populated: Incident ID, Call Date, Fire Number, Response Type, EMD Card Number, Mileage, Map Page, Address, Zip Code, Events, Comments, Census Tract.
-
CAD mileage information is automatically imported if available.
-
Tip: The CAD Detail comments can be imported into the narrative. Contact Support to enable this feature.
To import CAD data in Web
-
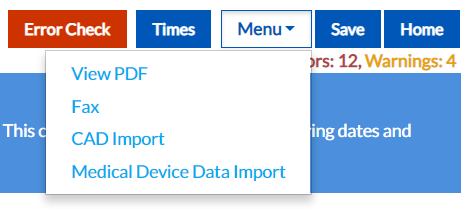
From any page of the run record, in the upper right corner, click Menu.
-
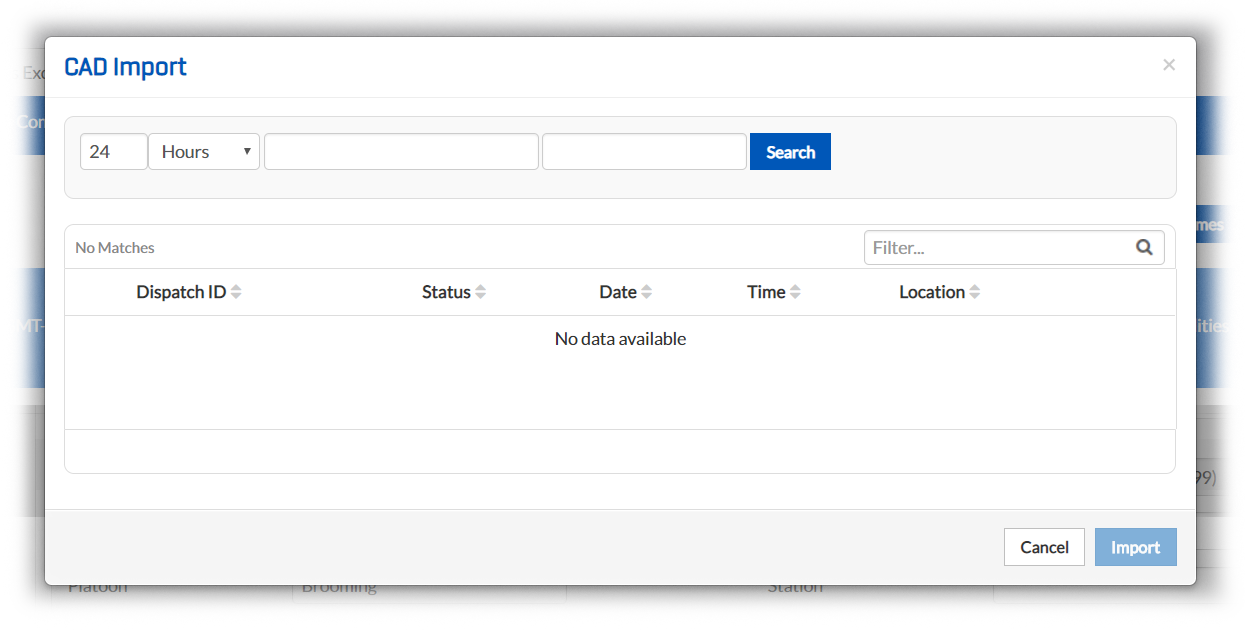
From the list, select CAD Import. The CAD Import window opens.
-
Select the date range you want to search within, and then click Search. You may not enter a search range greater than 30 days without also entering a Responding Unit.
-
Select the record you want to import. To ensure it is the correct run, click View Details.
-
Click Import.
Note: The CAD data only fills empty fields in the record. Any data entered manually is not overwritten.