TripTix —Windows Action-Centric Dashboard
The action-centric dashboard features a completely new level of visualization for the TripTix-Windows user. On it you will find faster access to relevant information about documentation needing your attention. Central to this is the action-centric grid—a table of your patient care records—organized by status, file location and age, along with link to the most relevant actions and a menu of advanced actions that may be taken on each record.
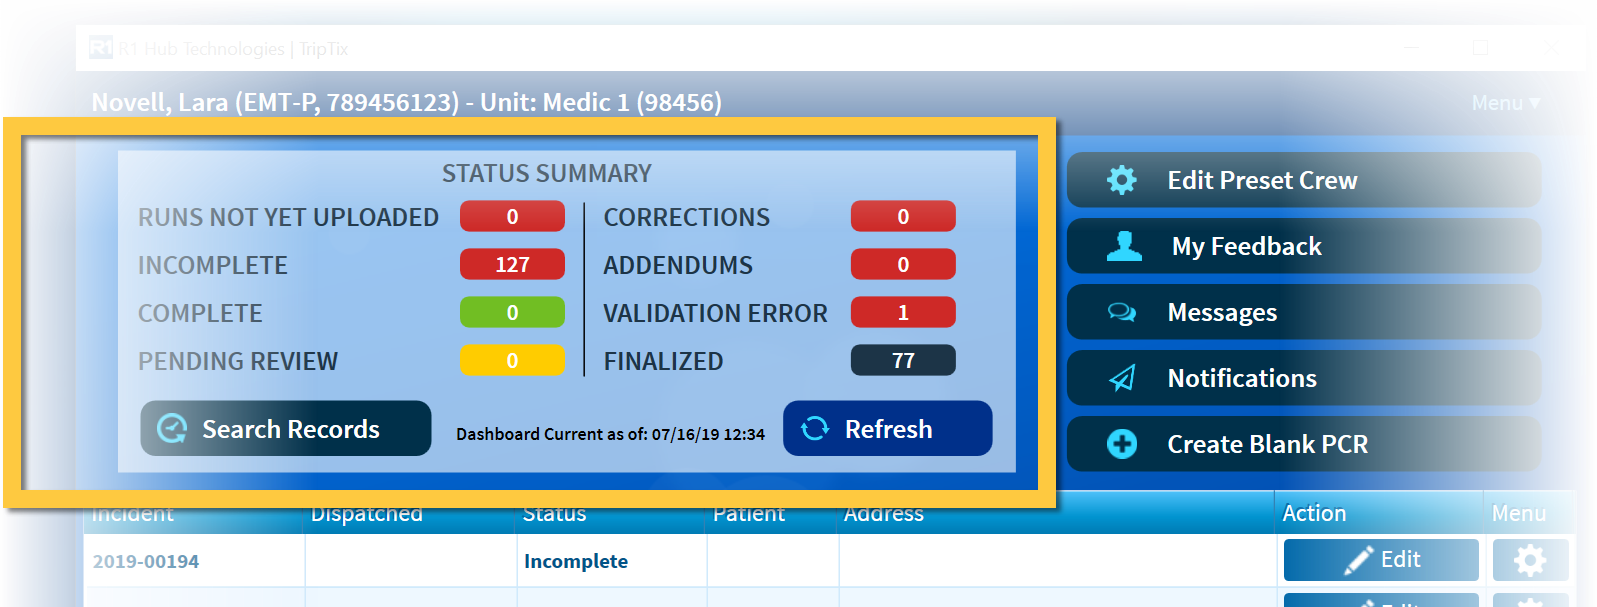
Tap any of the buttons shown in yellow box, above, to jump to the associated search.
For Departments with CAD Integration
If your department has CAD integration, you will now be able to open a new ePCR and import the CAD record in one click. You can complete addendums, view a run summary, copy, fax and print, all from the dashboard.
To Use the No PCR Needed Feature
If this feature is enabled by a department administrator, it allows you to indicate from a CAD run that no PCR was needed. (If, for example, the run was cancelled before you arrived, etc.)
- Locate a CAD import on the dashboard.
Tap the Menu button (the sprocket icon ) and select No PCR Needed. A new ePCR opens.
 - Link the CAD data and complete the fields according to settings managed by your department. A complete—or mostly complete—report appears, and it can be finalized in very little time.
View QA Forms via My Feedback
You can view quality assurance forms previously visible only on CDX.
A new button on the dashboard, My Feedback, will alert you to newly available forms for review. Additionally, read receipts from forms viewed on TripTix - Windows will be available for review by QA/QI personnel.
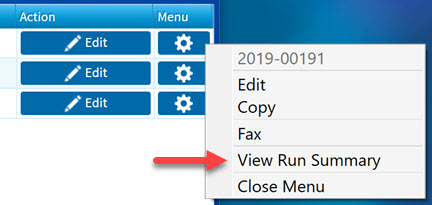
View a Run Summary
You can view a Run Summary screen for your own runs within the application. (Note: You will have to sign in with your TripTix Web credentials the first time you load a run summary.)
- Tap the Menu button () to the right of the run you want to view and select View Run Summary from the popup.
The Run Summary window opens, displaying the PDF, attachments, QA/QI forms, comments and revision history. (See Navigate a Run Summary for more detail.)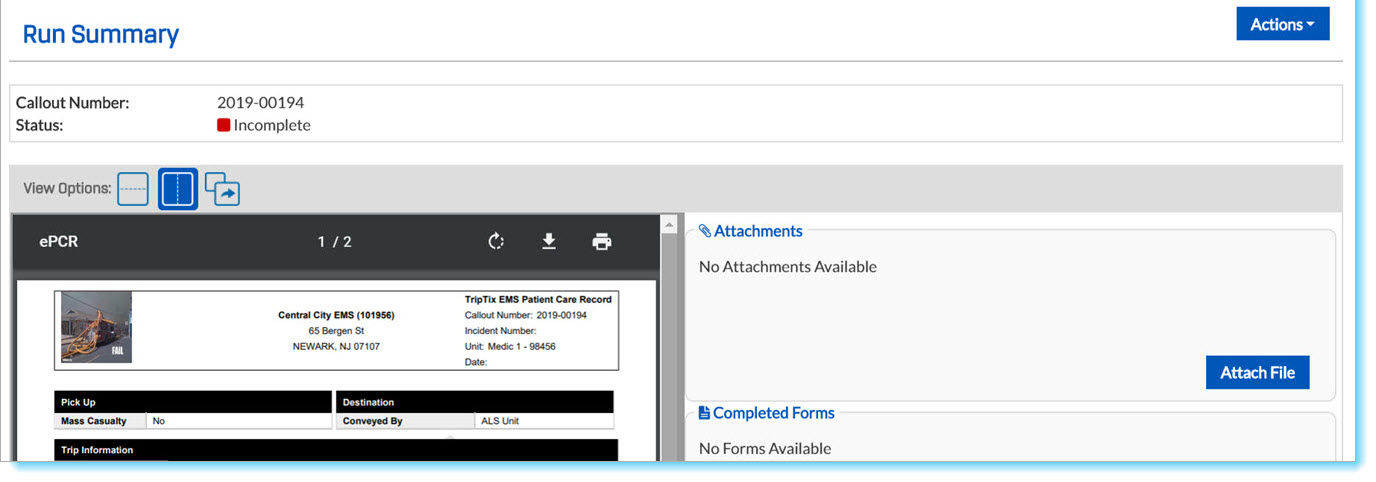
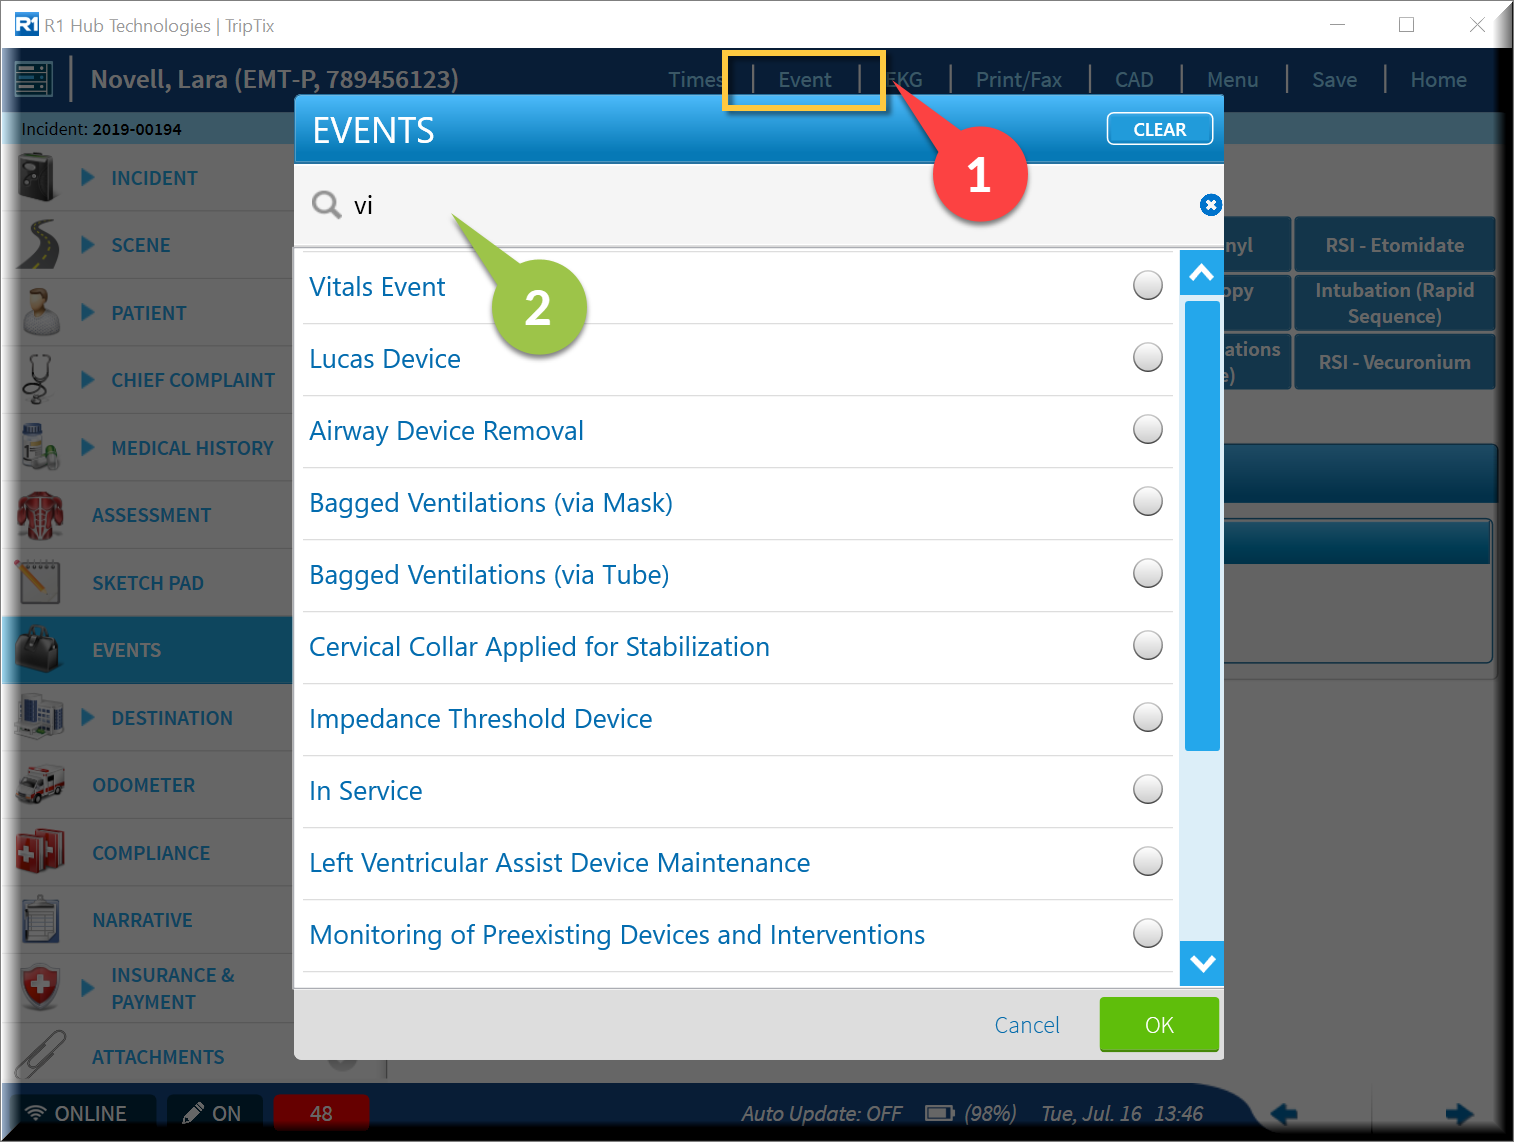
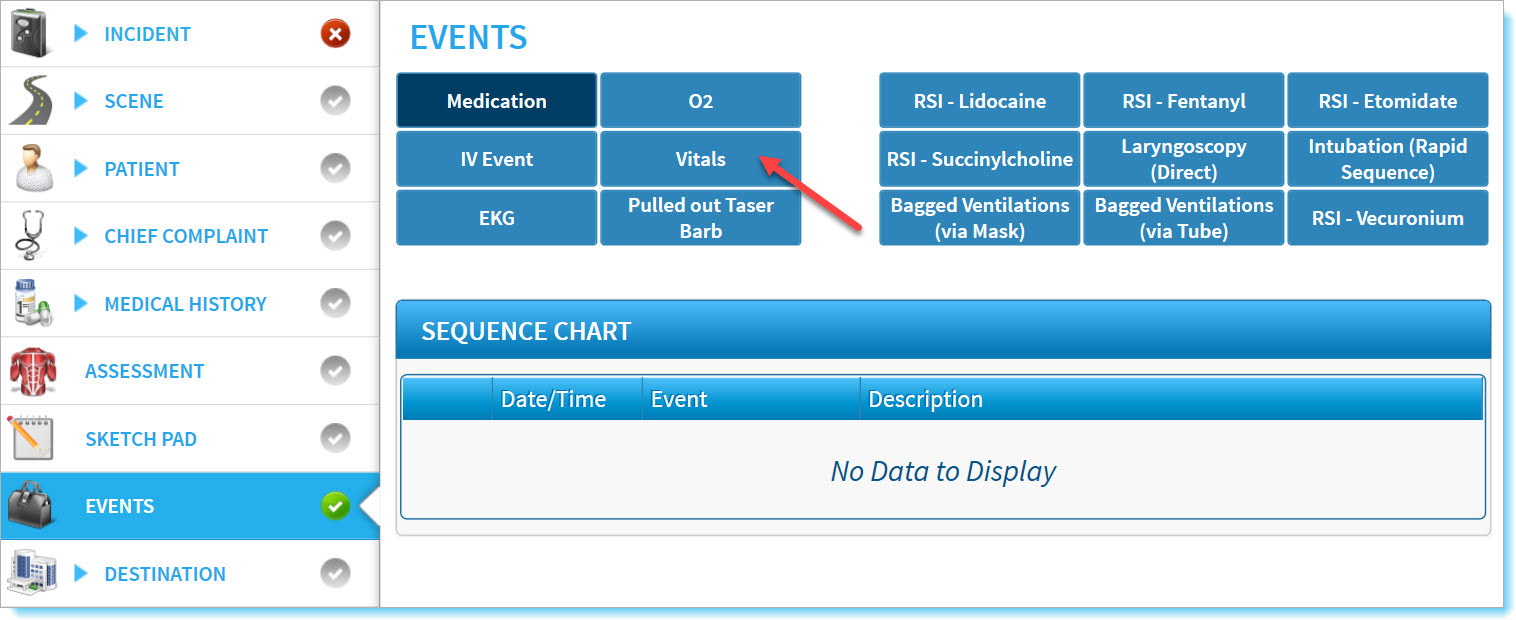
Vitals Event Separated from Assessment Window
Starting with TripTix version 14.4.1, only physical exam findings will appear in the Assessment window. Vital signs are now input in a separate window via the Events workflow. This separation allows for more specific interactions between the Vitals Event and Assessment sections and the Flexible Business Rules engine.
Note that both Vitals Event and Assessment have a Within Normal Limits option, which can be configured according to your department’s preference.
To Enter Vital Signs
You can input vital signs one of two ways.
- Tap Events, at the left of the ePCR screen.
- Select Vitals from the Events list.
Alternate Method to Input Vitals
- Tap on Event in the top menu bar, and the Events window opens.
- Begin typing "vitals" in the filter field, or scroll to bottom of the list to select Vitals Event.