Response time events refer to those events such as dispatch time and the time arrived on scene. Each transport must contain, at the very least, the following six response time events: Dispatched, Enroute, On Location, Departed Location, Arrived Destination, and In Service. Response time events only contain one section: the Event Log.

If you want to add response time events in real time during the call, you can do so via the toolbar.The Quick Times window allows you to chart times as the call proceeds.
Additionally, depending on the disposition chosen, the available fields indicate the times required for the specified run type (refusal, transport, etc.). As needed, use the up and down arrows found in the time and date fields to adjust the hours, minutes, or dates entered. As you enter times, a check appears in the check box to indicate that an event has been added to the Sequence Chart for the response time. Times not required for a specific disposition are read-only. For example, Arrived Destination would not apply if the patient refused transport.
|
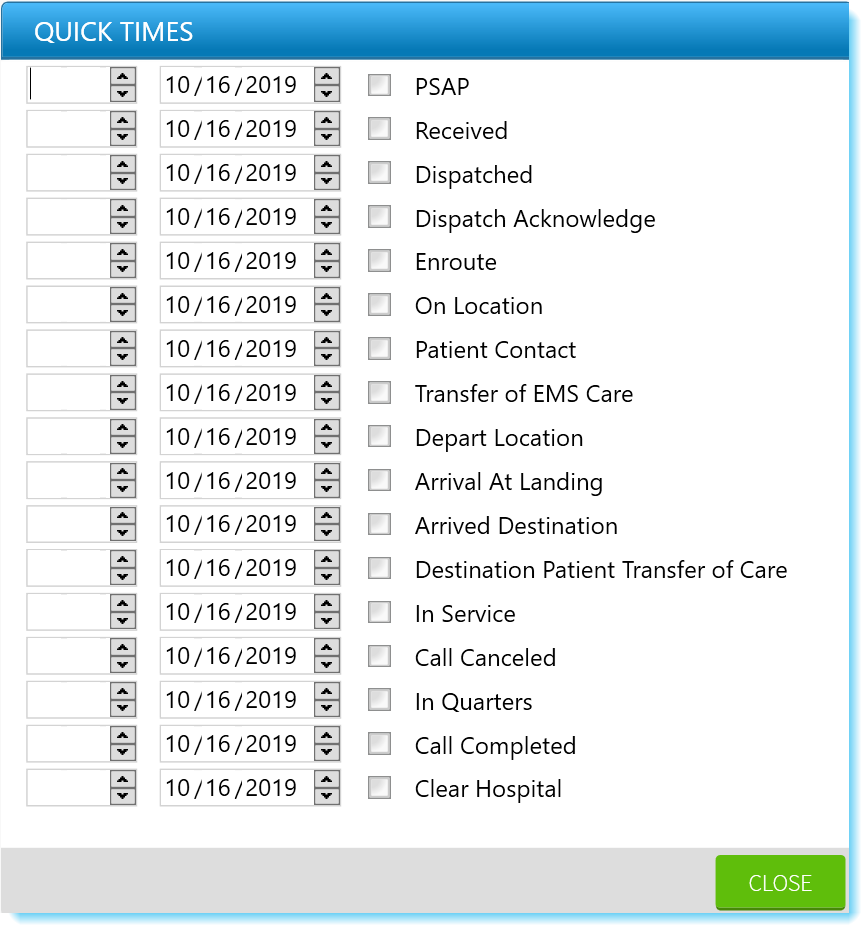 |
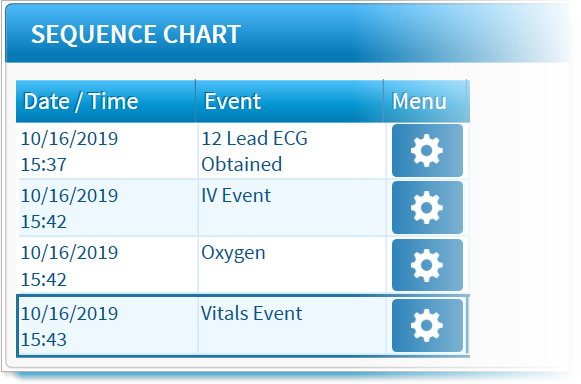
Times appear as events in the Sequence Chart. They can be edited directly from the chart or by clicking Times again and repeating the above process as you make your changes.
Note: If the feature has been implemented by your department, you may input future date/time events. If, for example, you knows when they will arrive at a hospital, the run record owner could input that time en route.
To Add a Response Time Event in Windows
In TripTix Windows, the most common response time events appear as buttons at the top-center of the Events window.
-
In the side navigation menu of an open run record, tap Events. The Events window opens.
At the top of the Events window, tap one of the response time events. (In the example, the user clicked Medication.) The associated Event Log window opens.
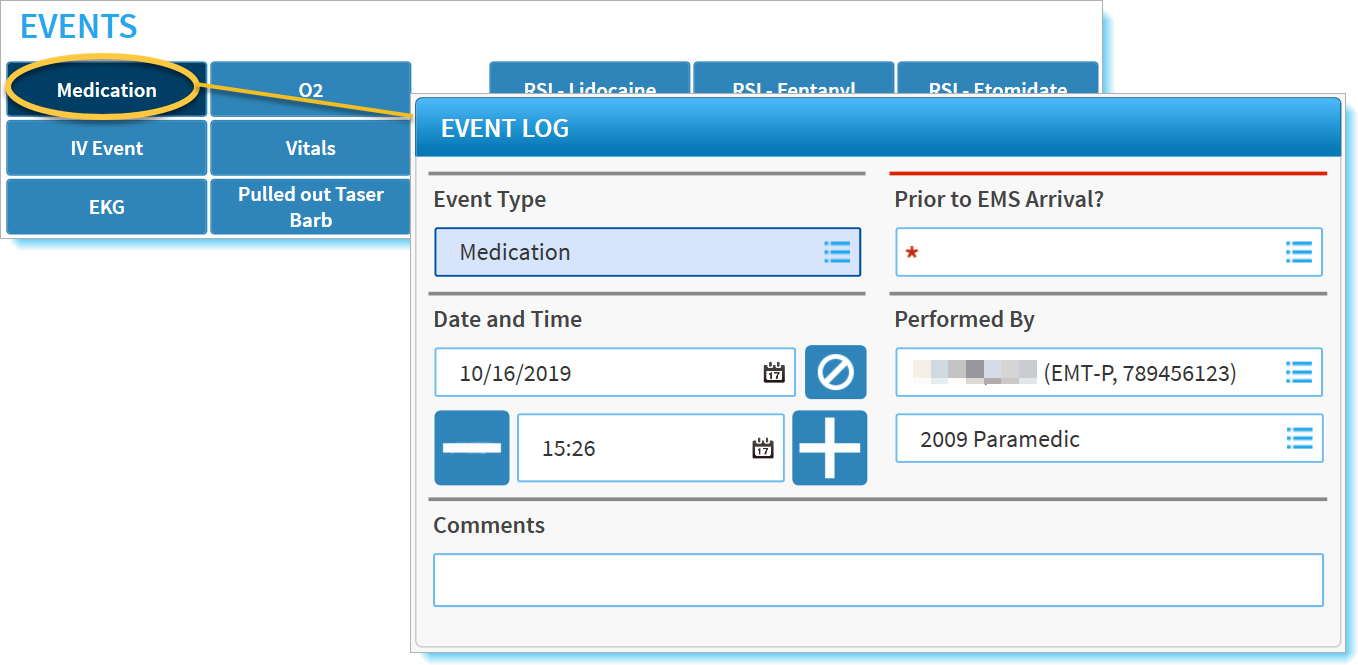
Enter information in the fields using any of the following methods:
-
Tapping a field to type in an entry.
-
Selecting options from a window that opens.
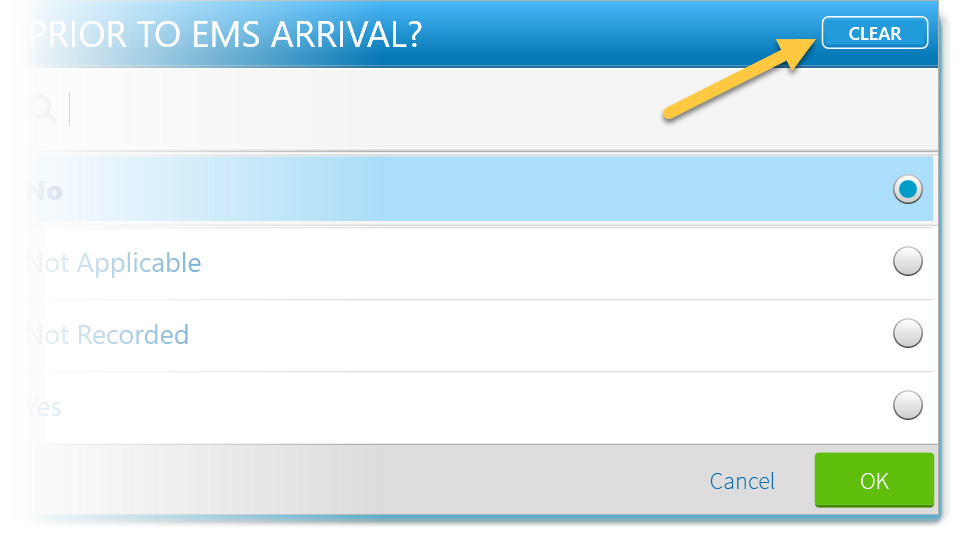
To clear a selection made in a picklist window:
-
Tap in the field.
-
In the upper right corner of the newly opened pick-list window, tap CLEAR.
-
Tap OK.
-
To re-enter or clear the information in a single field, tap the clear icon.
-
When finished entering information in the fields, tap OK. The response time event appears in the Sequence Chart table.
To Add Response Times from the Toolbar in Web
Tip: If using a keyboard, press Tab to easily move from field to field. The cursor only moves to applicable response times; it will not enter a field that is read-only or does not require a value.
-
From anywhere within the open run record, go to the toolbar and click Times. The Quick Times window opens.
-
Enter times for the applicable response time events.
-
When finished entering information in the fields, click Close.
Quick Times Keyboard Shortcuts
The following keyboard shortcuts can be used when entering times in either TripTix Windows or Web.
Tab
-
Press the Tab key to advance down columns.
-
Enter a portion of the date or time data and press Tab. The rest of the date and time auto-completes.
Shift + Tab
Press Shift + Tab to advance up columns.
Arrow Keys
Press the up and down arrow keys to incrementally decrease or increase the highlighted field's data. For example, if in the time field, pressing the up arrow would increase the listed time by an hour.
Shift + Arrow Keys
-
Press Shift + an up or down arrow key to move between fields within the same column.
-
Press Shift + a right or left arrow key to move between fields within the same row.
N
Press the 'N' key to populate the field with the current date or time.
Tab, (:), (/), (.)
Press Tab, (:), (/), or (.) to skip a field. The field auto-populates with the missing information based on entered times and/or the current time.