When creating or editing a run record, you can record what happened during the incident by adding events to the run record. You can review events already recorded by referring to the table in the Events section or the Sequence Chart.
Events include response times, such as when the EMS crew was dispatched to the scene or when contact was made with the patient. Events can also include any treatments, assessments, or procedures given to the patient, such as vitals or medication administrations.
Generally, time events only contain an Event Log section. Medical events tend to contain three sections: Event Log, Event Detail, and Authorization.
Note: Some events may contain different sections and fields than the ones described in this guide. This list contains only common sections and fields to provide a general guide for entering events.
In TripTix Windows, common events appear as buttons at the top of the Events page. You can add other events as needed.
When you add an event, it appears in the events table. You can review the table to see all of the events recorded for an incident. To sort the table by a column, click the column header. Click the column header again to invert the order. To edit any event in the table, click the event's corresponding Edit link. To delete an event, click the event's corresponding Delete link.
See the following related to managing specific events:
-
Add an event: IV, medication, response time, vitals
-
Event fields - Includes definitions of certain terms, explains how to enter information in unique fields, and gives valuable shortcuts to completing this section. Specifically, fields for airway, IV, laboratory, medication, ventilator, and vitals events are covered.
Table View Editing Mode
Table View Editing mode, a feature turned on by an administrator via System Settings (Table View Editing), provides more screen real estate for entering events. When adding events, this mode divides the screen vertically, showing the sequence chart on the left and the data entry fields for the new event on the right. Not only does this provide a constant view of all events in the sequence chart, but it also makes adding additional events even easier by eliminating the need for pop-up windows.

As seen in the image above, the section navigation typically seen on the left is not visible when in this mode. To exit Events Edit mode and return to normal TripTix Windows navigation, click the Exit Events Edit Mode link in the top right corner of the page.
Tip: If this feature is not enabled for your department but you think you would benefit from this improved transparency, contact your department administrator.
Add an Event
Note: You can enter a maximum of 500 events into the system.
As seen in the Assessments section, if the information in some of the fields is not applicable or cannot be supplied, tap the Not Value button.

To add an event in Windows
-
In the side navigation of an open run record, tap Events.
-
Tap the type of event you want to add.
Tip: If you are looking for an event that does not appear as a button, tap New Event and select the event you want to document. -
Enter information in the fields using any of the following methods:
-
Tapping a field to type in an entry.
-
Selecting options from a window that opens.
-
Optionally, to clear a selection made in a pick-list window:
-
Tap in the field.
-
In the upper right corner of the newly opened pick-list window, tap CLEAR.
-
Tap OK.
-
-
To re-enter or clear the information in a single field, tap the clear icon.
-
Tap OK. The event appears in the Sequence Chart table.
-
To verify all required fields are completed, check the record for errors.
You can also add an event quickly by tapping Event in the main toolbar at the top of the window. Doing so takes you to the Events page and opens the Events window, which you can use to choose an event.
To add an event in Web
-
In the side navigation of an open run record, click Events. The Sequence Chart subsection is displayed.
-
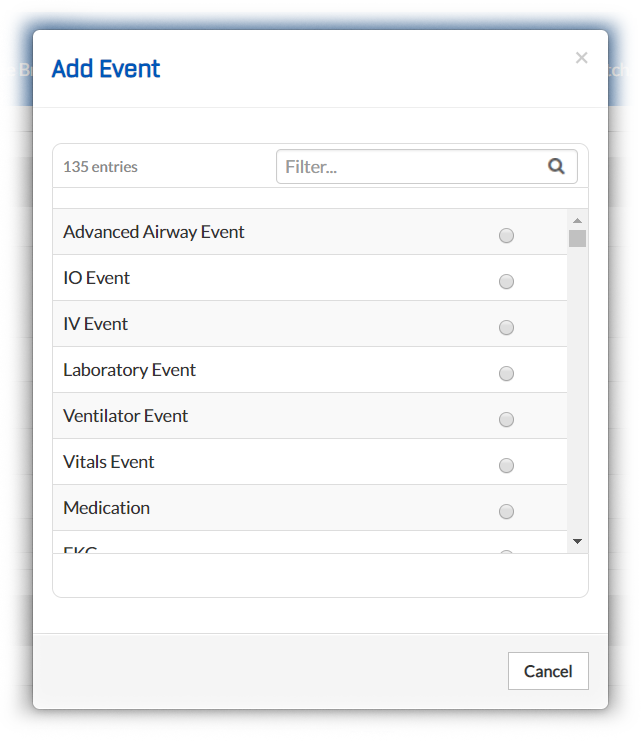
Click Add Event. The Add Event window opens.
-
Select the event you want to add. If needed, to quickly find an event, enter the first few letters of the event in the Filter field.
-
In the window that opens, enter the appropriate information about the event.
-
Click Save.
To manage an event, click the Actions button associated with the event. From the menu that opens, you can edit the entry by clicking Edit, delete the entry by clicking Delete, or copy the event by clicking Copy or Copy+Edit.